Hello everyone!
Hope you all are doing great. Today I am going to share two cards that I made with distress oxide inks. Actually you can make them with regular distress inks too. So have a look!

You can easily figure out how I made these cards right? Not much of a rocket science but I am going to focus on two tool which are used to make these cards. Both of these tools are DIY. Yes all with the stuff you have at home.
Tool 1 – DIY layering stencils
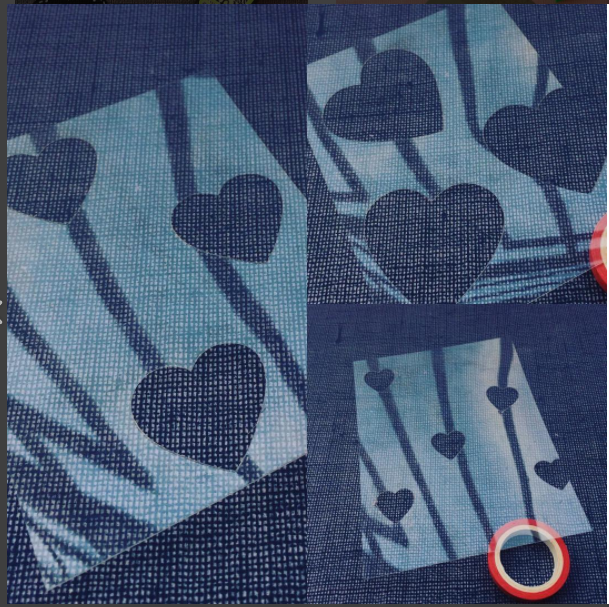
All you need to make your layering stencils is acetate (Transperancy sheets) and simple frame dies. The key here is selecting simple dies like circles, hearts, squares etc. Let’s make triple layered stencils today. So first select shape of your dies hearts for me! I have taken 3 heart dies. You don’t want them too big or too large.
Next step is to compose your largest die on the acetate. I have used 4.5 X 5.45 acetate piece but you may use 6X6.Here the aim is to spread the hearts all over the piece so you may have to die cut 3 or 4 times. You can also cut one or two partially to make it even more random.
Once you are done with layer one move on to second piece of acetate with medium sized hearts. Place the first stencil and put your second acetate on it. Now mark where you want to die cut with your medium sized dies. Make sure they overlap a little with the larger hearts. Cut out as many hearts as you want.
Lastly place new acetate on both the stencils and complete composition with the smallest hearts.
Done you have your own layering stencils!
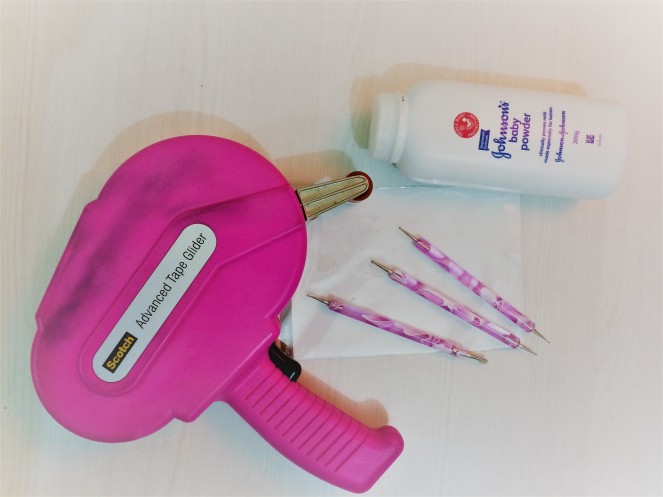
Tool 2- DIY embellishment pickup tool
Don’t you love all your sequins and clear drops but find it hard to place them. You can make your own DIY embellishment pickup tool with three simple items. Nail dotting tool, ATG (or other tape runners) and some talcum powder. Oh my god it is so simple. Just run your ATG on a packing sheet or acetate for three four times. Then put you nail dotting tool at one end and start rolling the tape around it. Keep doing it till you form a blob at the end. To make this sticky blob manageable just sprinkle some talk and adjust the tackiness. Done!! Works like a charm. Once it stops being sticky you can just remove the blob and do it again.
Definitely try both the DIYs I am sure you will love them and also you can save some money (Which you can ultimately use for new stamps 😉 )
Definitely try both the DIYs I am sure you will love them and also you can save some money (Which you can ultimately use for new stamps 😉 )
So now time for the cards I made using these stencils.
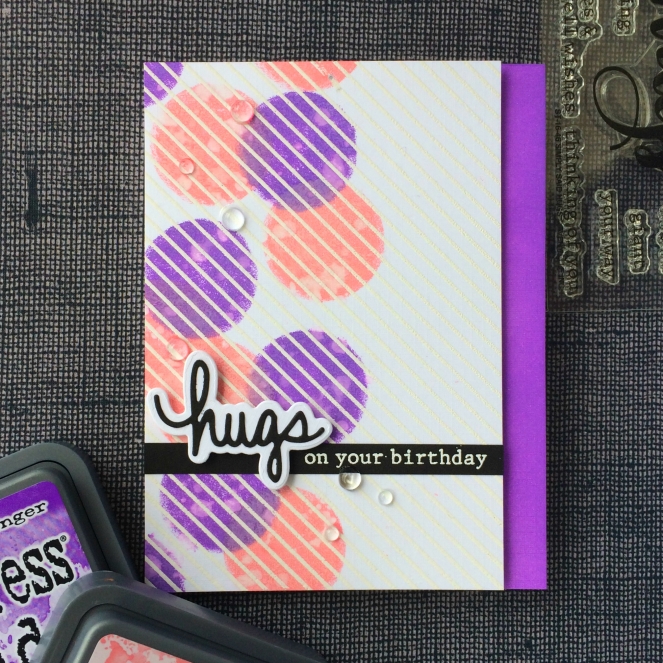
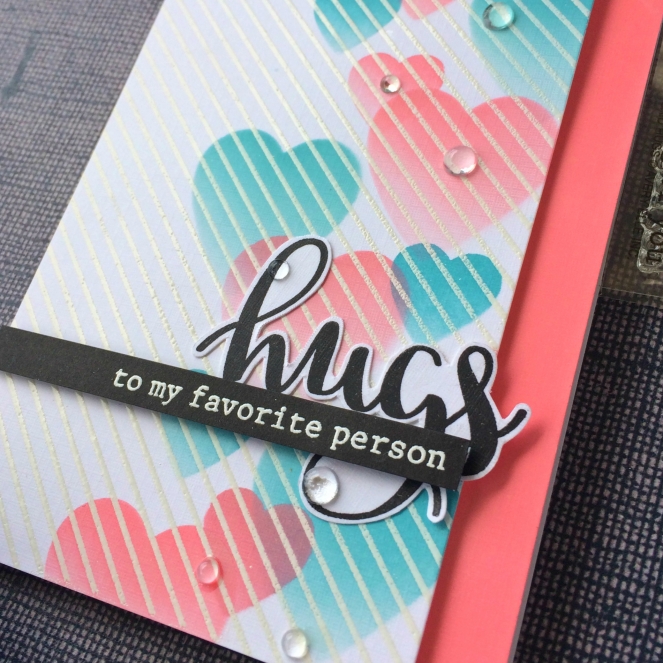
First I heat embossed the background with mft striped background stamp.and then stenciled the hearts with distress oxides. Added the sentiment and finished up with clear drops.
And here is the final card
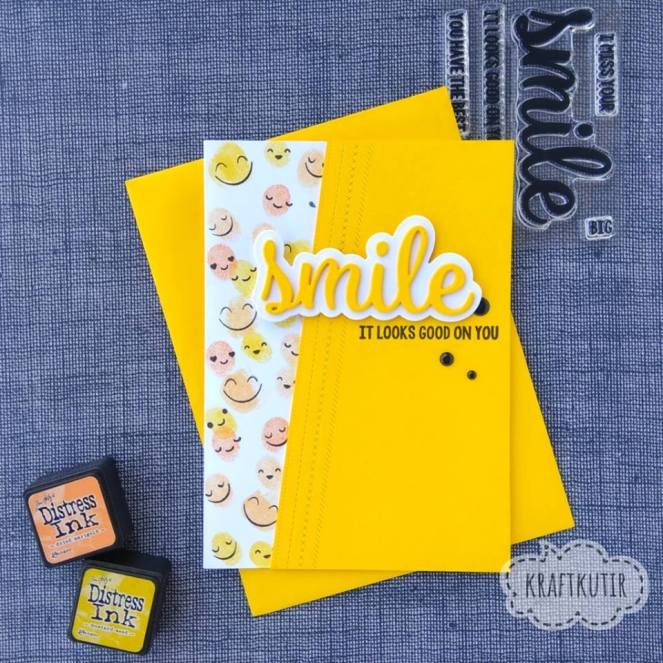
I made a similar one but instead of using stencils this time I used blending tools. So after embossing the background I just pressed the blending tool to create random circles. Finished it up with sentiment and clear drops.
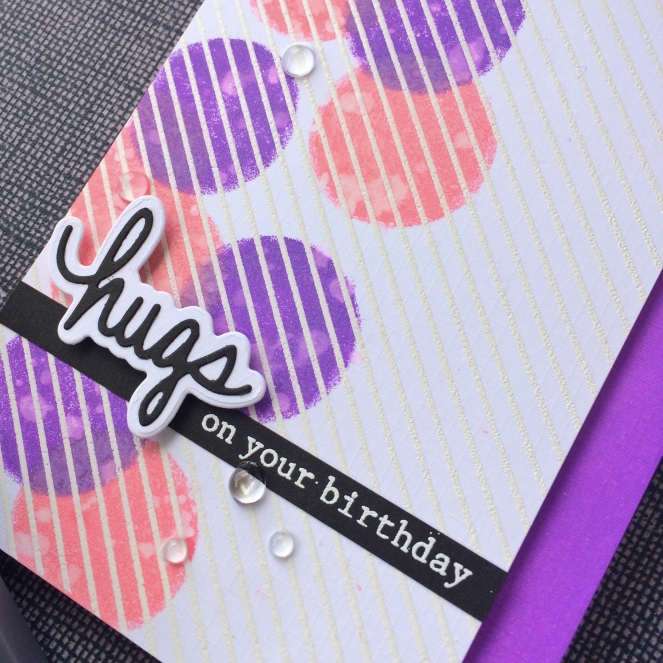
Following is an old card I made with same stencil.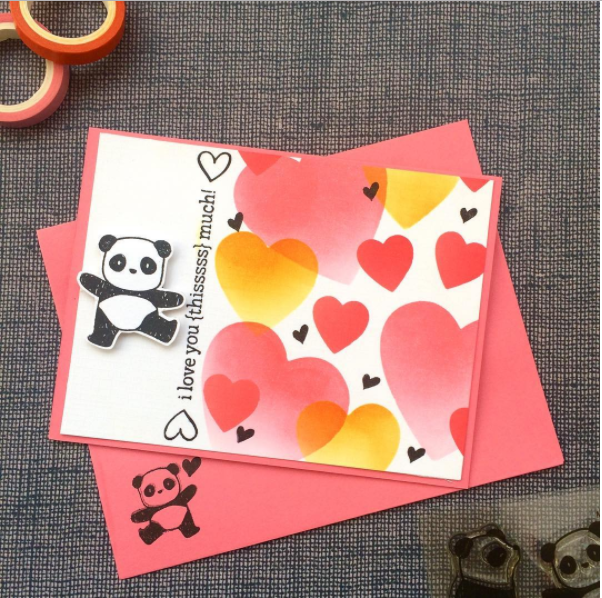
That’s it for today! hope you like the cards. Please give it a try and make those tools. I am sure you will love them. Also please leave a comment if you liked the post. Till then keep crafting!
cheers
Deeplaxmi
Important Links
Distress oxide inks
Letz craft , the craftshop
Nail art tool
amazon.in


![IMG_20170619_182459-01[1]](https://kraftkutir.wordpress.com/wp-content/uploads/2017/06/img_20170619_182459-011.jpeg?w=663)
![IMG_20170619_182823-01[1]](https://kraftkutir.wordpress.com/wp-content/uploads/2017/06/img_20170619_182823-011.jpeg?w=663)


 Hello everyone! I am so super excited to guest design for